
EC Cube
Enable Smartpay on your EC-Cube webshop with our simple 5 min integration!
Before getting started with the following steps, please make sure you have a working EC-Cube v4 codebase ready and make sure you meet all the requirements provided by the official documentation.
Installation
- Download the plugin zip file.
- Open your EC-Cube admin page
- Navigate to
オーナーズストア > プラグイン > プラグイン一覧 - Upload the zip file under
ユーザー独自プラグイン - After successfully uploading the zip file, click ▶ (有効化) to activate Smartpay.
Configuration
Smartpay Settings
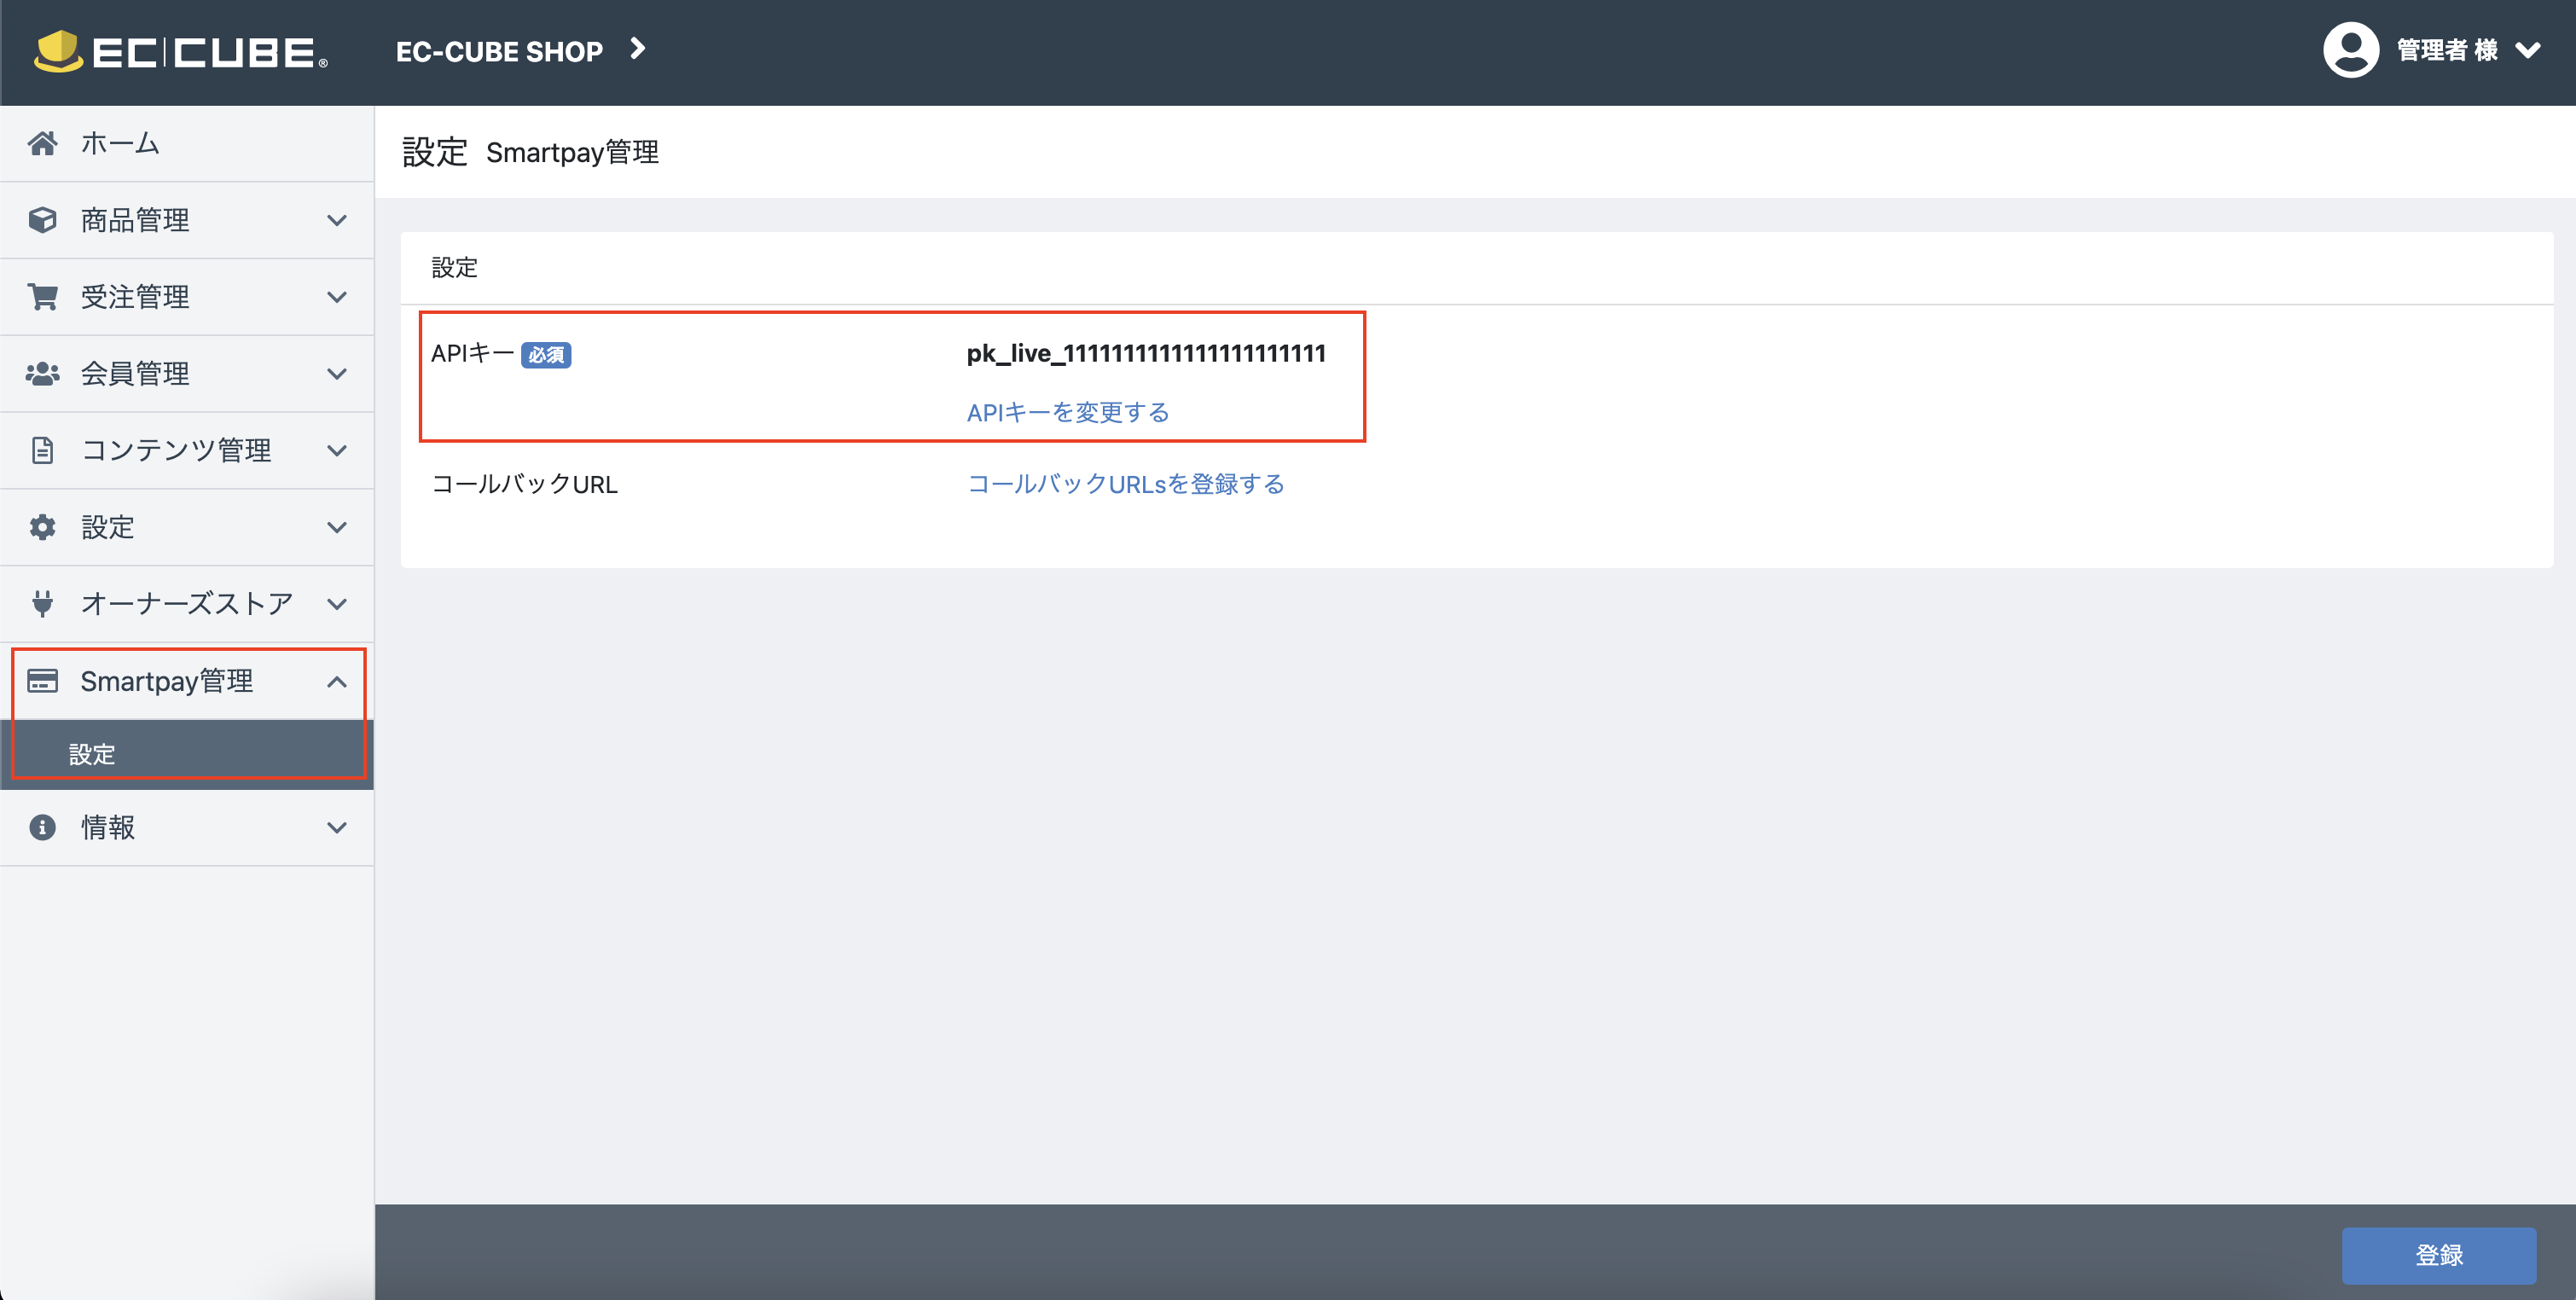
Open the Smartpay 管理 screen from the left navigation bar
- Fill in your Smartpay API keys. You can find your credentials at the settings > credentials page on your dashboard.
- Specify the callback URLs (optional).
- If you leave them empty a default callback url will be used.
- In case the consumer closes Smartpay checkout without completing the purchase by default they will be redirected back to the cart page so the consumer can select a different payment method
- In case the consumer successfully completes checkout the consumer will be redirected to a confirmation page and the order status will be updated to successful within EC-Cube
- If you would like to specify your own callback URLs please make sure you handle updating the order status correctly within EC-Cube. This is required for the order to show up correctly in your order list on the EC-Cube admin page.
You can find an example code for updating the order status in our plugin here.
- If you leave them empty a default callback url will be used.
Enable Smartpay
Although Smartpay should already be enabled in our earlier steps, we recommend you double-check the following configs on EC-Cube Admin just to make sure. If any of the following is not yet enabled, please make sure it is.
- On the
設定 > 店舗設定 > 支払方法設定screen confirm thatSmartpay決済payment method is enabled - In the
設定 > 店舗設定 > 配送方法設定settings make sure thatSmartpay決済is enabled for all delivery methods

Congratulations!
Your users can now checkout with Smartpay. All they have to do is to select Smartpay決済 as the payment method.
Redirected to Smartpay Checkout
You will be redirected to Smartpay Checkout.
Testing
We aim to provide the smoothest developer experience, hence we make it straightforward for you to test your integration.
When testing please use your test keys to create a checkout session and launch Smartpay checkout. In test mode the payment is not processed by card networks or payment providers. It enables you to feel safe working on the integration without having to worry about actually being charged.
Test mode checkout will show a テスト中 banner on the top right corner so you can easily verify you are using test mode.

Test consumer account
To complete a test mode checkout you need a test user account. Please follow the instructions below to sign up as a test user to Smartpay.
EMAIL ADDRESS
Once you are redirected to Smartpay checkout, all you need to do is to use any email with a +test suffix, e.g. [email protected] to sign up, and it will immediately be regarded as a test account.
PHONE NUMBER
When prompted for a phone number please provide a valid Japanese mobile number.
Smartpay verifies the shoppers' phone number by sending a one time password via SMS to the phone number specified during sign up. For test accounts however this one time password is not sent via SMS, it is already pre-filled for you on the form.
CARD NUMBER
Your test Smartpay account will come with pre-configured card numbers so you can test all the different outcomes:
- Success:
4242 4242 4242 4242 - Hard decline:
4100 0000 0000 0019 - Soft decline:
4000 0000 0000 0119
For test consumers you will not be able to add your own card or use Apple Pay or Google Pay.

Updated 8 months ago