
Salesforce
Installation
Prerequisites
- Supported SFRA Version: 6.0 ~ 6.3
- Node.js: v12.21.0 is recommended by SFRA. You can use nvm.io to install specific Node version.
Setup SFRA Base Dependency
-
Download SFRA base: Follow the instruction and download the SFRA base repository
-
Unzip the SFRA base package to
../storefront-reference-architecture-masterto match the base path defined inpackage.jsonfile.
Compile
-
Run
npm install; npm run compile:js; npm run compile:scssin the SFRA base path. -
Run
npm install; npm run compile:js; npm run compile:scssin the Smartpay cartridge path.
Upload
Use your preferred tool to upload the compiled cartridge to your SFCC server.
Here's example steps of uploading the cartridge using VSCode & Prophet Debugger Extension.
-
Install Prophet Debugger Extensions: Open VS Code and install the Prophet Debugger from the marketplace.
-
Configuration: Create these files at the
.vscodefolder of your project. Populate it with your sandbox credentials and settings..vscode/launch.json{ "version": "0.2.0", "configurations": [ { "type": "prophet", "request": "launch", "name": "Attach to Sandbox" } ] }.vscode/dw.json -
Upload the Cartridges: Run
Prophet: Clean project/Upload All.
Business Manager Configurations
For the Smartpay integration to work, the following needs to be configured in the Business manager.
Activating the cartridge in Business Manager
Before Smartpay becomes available for your shoppers, the cartridges have to be added to the cartridge path of the Site. In order to do this, follow the following instructions:
- Log into Business Manager.
- Navigate to
Administration > Sites > Manage Sites. - Click on the site name and on the next page go to the
Settingstab. - In the
Cartridgesinput field addint_smartpay_sfra:int_smartpay_core:bc_smartpay:in front of the base cartridge path. - Click on the
Applybutton. - To activate the cartridge for the Sandbox/Development/Production instances repeat steps 4 and 5 after selecting the appropriate instance from the
Instance Typedropdown menu. - Repeat steps 3 to 6 for each site that is to use Smartpay.
- Go to
Manage the Business Manager site. - In the
Cartridgesinput field prependbm_smartpay:int_smartpay_core:. - Click on the
Applybutton.
Enable Cartridge Module
To enable the Cartridge module
- Go to
Administration > Organization > Roles & Permissions. - Click on
Administratorand click on theBusiness Manager Modulestab. - In the Select Context dialog, check your site ID checkbox and click the
Applybutton. - Find Smartpay and check the checkbox to enable it.
- Click on the
Updatebutton.
Importing Metadata
For the Smartpay integration to work, the following object structures (metadata) needs to be imported and configured in the Business manager.
- In the cartridge bundle find
metadata/ smartpay-meta-import/sites/RefArchfolder.
- Rename this
RefArchfolder to the ID of your site. If you have multiple sites to which these meta has to be imported, then copy and paste thisRefArchfolder to replicate for other sites. Renames those folders with ID of corresponding sites. - Modify
context site-idvalue of thejobs.xmlfile to your site ID. - In the cartridge bundle, inside
metadatafolder, compress smartpay-meta-import folder to generatesmartpay-meta-import.zipfile. - Go to
Business Manager Menu > Administration > Site Development > Site Import & Export - Under
Import > Upload Archiveensure that theLocalradio button is enabled. - Click on the Choose File input field, select the
smartpay-meta-import.zipfile you just created and click on theuploadbutton. - After finishing the upload, from the Archives list click the radio button corresponding to
smartpay-meta-import.zipand click on theImportbutton. - Click on the
OKbutton of the confirmation box asking, Are you sure that you want to import the selected archive?
After the successful metadata import, the following attributes should have been created:
Custom Site Preferences
In Business Manager, navigate to the Merchant Tools > Site Preferences > Custom Preferences. Custom site preference groups with the ID Smartpay Settings will be available.
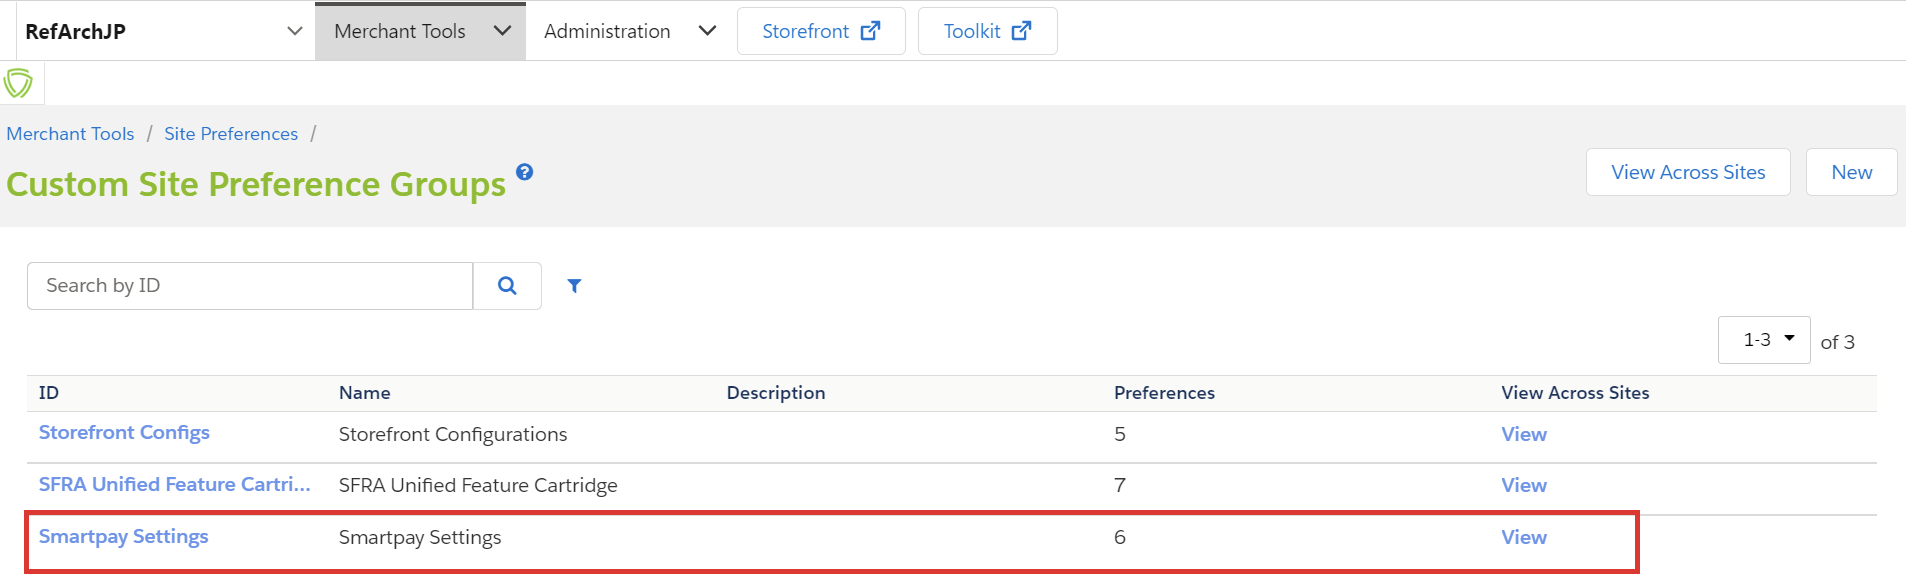
Please select it and edit the attributes according to your Smartpay account data.
For each site, set the values for your site preferences.
- Is Smartpay Enabled (ID: isSmartpayEnabled, Type: Boolean) – Enable and disable Smartpay and its functionality in a single point.
- Api Secret (ID: smartpayApiSecret, Type: String) – Api secret of Smartpay.
- Payment Mode (ID: smartpayCaptureMethod, Type: Enum of Strings) – Select transaction type.
- Minimum Checkout Value (ID: smartpayMinPrice, Type: String) – Set minimum amount of order in order to select Smartpay.
- Maximum Checkout Value (ID: smartpayMaxPrice, Type: String) – Set maximum amount of order in order to select Smartpay.
- Orders Created Time(ID: smartpayOrdersCreatedTime, Type: String) – Find the orders behind this given time. Set time in minutes.
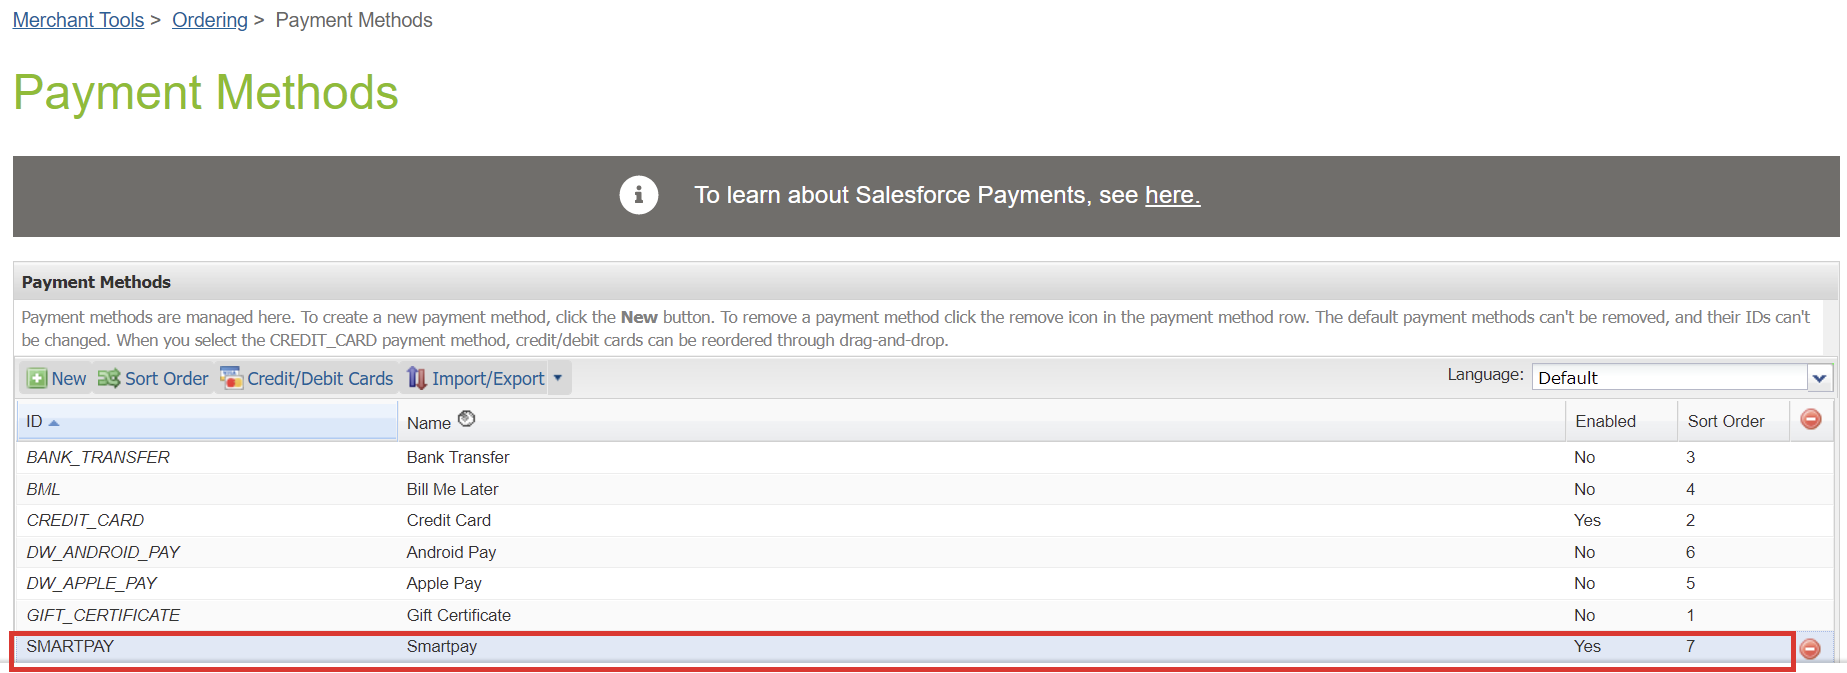
Payment Methods
Under Merchant Tools > Ordering > Payment Methods, check that payment method with ID ‘SMARTPAY’ is created.
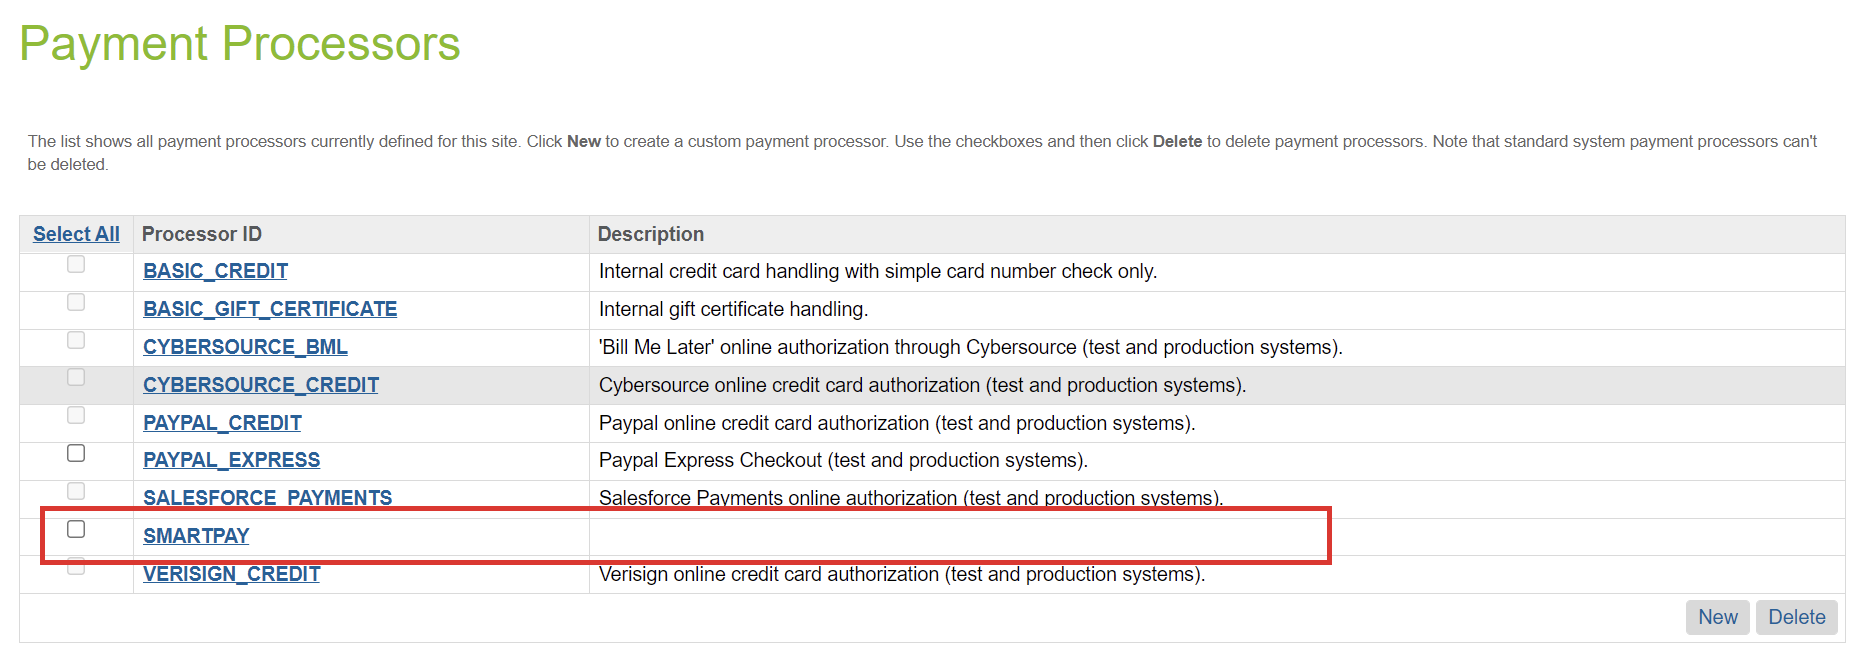
Payment Processor
Under Merchant Tools > Ordering > Payment Processors, check that payment processors with ID ‘SMARTPAY’ is created.
HTTP Services
Under Administration > Operations > Services, check that service with ID ‘smartpay.http.generic is created.

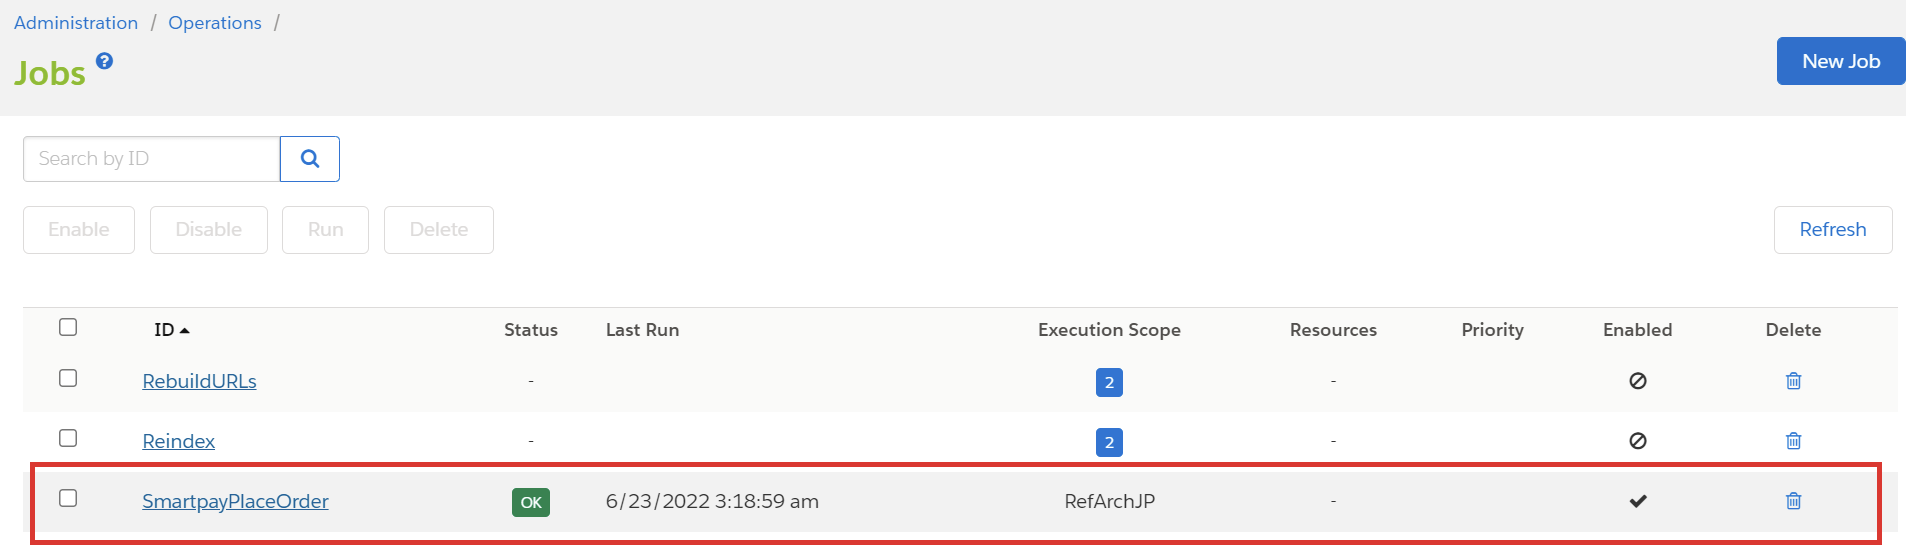
Jobs
Under Administration > Operations > Jobs, check that job with ID ‘SmartpayPlaceOrder’ is created.
Updated 8 months ago